 appStalkers All About Apps & Phones In One Place
When you blend text and graphics on a slide, it usually has a greater impact. Both can be used to provide context, demonstrate a process with a visual example, or make the information more engaging in general.
It’s best if text and image don’t overlap when they’re both presents at the same time. As a result, you might want to correctly enclose the text, which looks better and addresses the problem.
If you’re new to Google Slides, one of the most common problems you’ll run into is being unable to wrap text around photos and other objects. Wrapping text in Google Slides doesn’t work the same way it does in other popular presentation software! So, what are your options? Here’s how to wrap text in Google Slides to make your presentations look a little smarter than usual.
[lwptoc]How to Wrap Text in Google Slides
- Simply click on “Text Box” after opening the document that needs to be changed. Under the Insert menu, there is also a text box option
- Add the necessary text and mark the spot on the slide where an image should be placed
- The graphic element is then added. Resize the image to the proper dimensions and place it where you want it on the slide
- Now pick the text box until it has a blue border. After that, drag the blue border to the image’s edge or the appropriate length
Improve How the Text Wrap Effect Looks in Google Slide
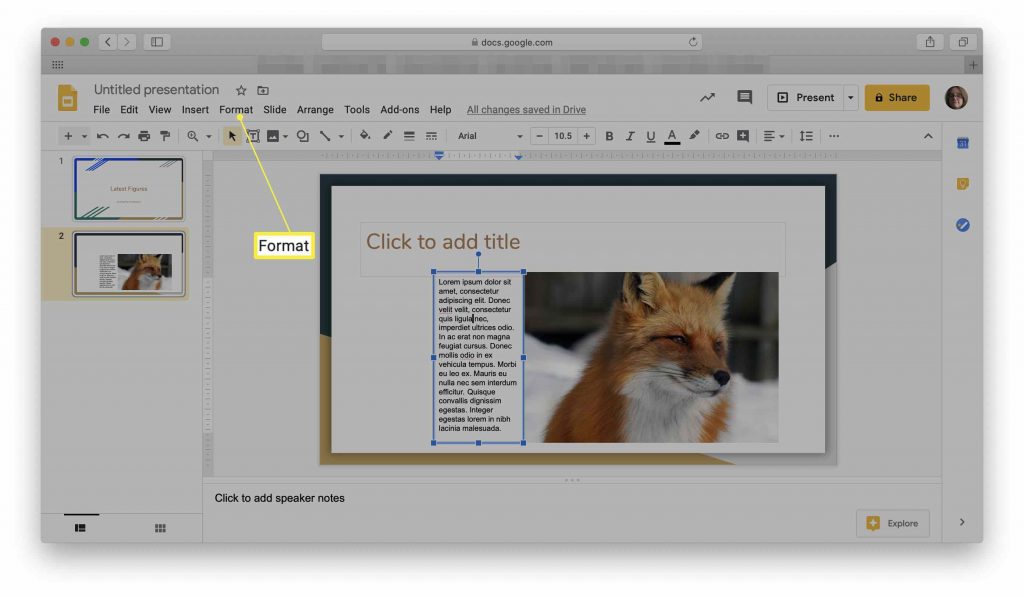
- Click on the “text box”
- Select Format
- Click on Align and Indent
- Select Justified
- This makes the text box’s alignment more professional by removing the jagged right edge
How to Outline Text in Google Slides
- Click on the Insert option in the toolbar
- Select Drawing
- From the drop-down menu, select “Word art”
- Enter your text in the new window that appears
- Press Shift + Enter to increase the number of lines
- The option ‘Fill color’ will appear on the control panel. You’ll be able to select your preferred color after clicking on it
- If you want to modify the color of the outline, go to border color and select the color you want
- Finally, adjust the position and rotation of your text to your liking
How to Make Text Curve in Google Slide
In Google Docs, you may utilize curve text in addition to photos and other lines to make your material more appealing.
- Click on the Insert menu and select “Drawing”
- Put your cursor on the arrow to the right of the “line tool” and select “curve”
- Now make the curve that you prefer
- When you’re finished, click Save & Close. In your document, the curve will show up
- In the document’s editing text box, click the curve image and type your text around the curve
How to Put Image Behind Text
Take a look around: the writing on top of the image gives the consumer expressiveness and an emotional hook. Many examples and discussions of how to improve the effect of text with photos can be found on the internet. I’m sure you’ve wondered how to move photos around in Google Slides. Let’s take it a step further and look at how to add text to a photo in Google Slides.
- Click on Insert in the toolbar
- Select “Drawing”
- Upload an image
- Choose the Text tool and drag the text box over the image, resizing it if necessary
- Add/type the text you want
- Then click on save
Another way to do this if you already have your image open is
- Select the image and click right-click
- Go to order
- Click on send to back
How to Transparent an Image in Google Slides
You can draw attention to a subject, create a mystery background effect, or make a document livelier by lowering the opacity of an image. With a few mouse clicks, you can create a transparent Google Slides background.
- Insert your preferred image from the Insert option in the toolbar
- Select the image then Click on the Format Option
- Select “Adjustments” and from there you can adjust the transparency of your liking and also edit the image
How to Add Bullet Points to Google Slides
- Enter between each line as you type your list of text. Then, on the right of the document ribbon, choose the list and then the Bulleted list icon.
- Each line of text will now include bullet points. Select the text, then press and hold Ctrl+Shift+8 (for PC) or Cmd+Shift+8 (for Mac) to add bullet points to Google Slides quickly.
- Bullet points can be indented as well. Simply place your cursor after a bullet point at the beginning of the line and press Tab. The line will now be indented as a result of this action. To indent the line further across the slide, keep pushing the tab many times.
- The design changes as the bullet point is moved forward. Select the text and use the drop-down option next to the Bulleted list in the ribbon to change it. There are a variety of design possibilities available to you.