 appStalkers All About Apps & Phones In One Place
A hard drive is a major component of the system that allows the operating system and BIOS (Basic Input/Output System) to run. If the hard drive fails, the operating system cannot load and the computer will not start. The computer warns you whenever the hard drive shows some unusual behavior.
Personal data is extremely valuable, and no amount of luck will ever bring it back if it is misplaced or lost. When a hard drive shows signs of failure or other issues, it is strongly advised to purchase a new hard drive and save the data on the new drive. It is important to respond to the computer’s warnings in the beginning and take steps to save data by replacing a hard drive and reinstalling the operating system.
In this article, we will show you how to replace a laptop hard drive and reinstall the operating system.
[lwptoc]How to Replace a Laptop Hard Drive and Reinstall the Operating System
In this section, we’ll walk you through the basic steps for replacing a hard drive in a laptop, as well as how to reinstall the operating system.
Backing up Data
Every user’s data is their most valuable asset, and if their hard drive fails, they will lose their data. As a result, your first step should be to back up your data, like programs, documents, photo and video files, or anything else. You can save these items in the cloud or external storage device such as a USB.
Recovery Disc Creation
To reinstall your Windows operating system on your new computer, make a recovery disc that the computer can use to boot up the new, blank drive after it has been installed. You can make one by going to the Windows website for your operating system version and downloading it to a CD-ROM or USB device.
You will require storage space to reinstall your Windows operating system. Make sure to create a recovery drive with sufficient space so that windows can be installed when you start the process.
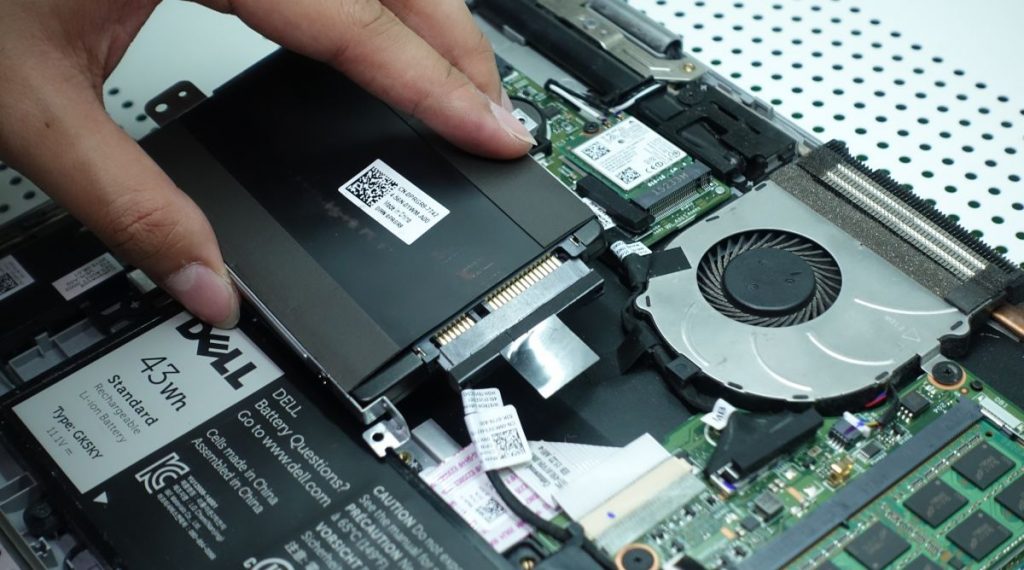
Remove the Old Drive
Before you begin, make sure your computer is turned off and unplugged. We also recommend using an anti-static mat and wristband. This tool grounds both the computer and you, preventing any built-up static electricity from reaching the computer’s delicate internal components and potentially shorting them out.
To begin the process, open the door of your computer case. It is generally held in place by small screws or a sliding mechanism. After you and the computer are safely grounded, locate the hard drive and remove the power and data cables from the drive itself.
Refer to the installation documentation for the new hard drive, and then work backward to see how to disconnect the old hard drive from the power and data connectors. If you’re not sure, look for your specific computer brand online.
The drive is usually held in place by a set of small screws. Remove these first, and then use a sliding motion to remove the hard drive from the computer case or bay. While it’s not necessary to physically remove the disconnected old drive, many people prefer to get it out of the way.
This frees up space in your computer case for other components like a second hard drive. It also increases the air movement around the new drive. If you decide to keep the old drive in the computer case, make sure all of the connections remain disconnected.
Place the New Drive
Simply reverse the previous steps to install the new drive. Connect the power connectors as directed by the new drive’s documentation, then connect the data connection cords.
You may have to slide the drive into the bay first, depending on how short the connectors are. As you work, a small flashlight can be useful for seeing into the small space of the bay. Replace the screws that hold the drive into the case, then replace the computer case door, and you’re ready to install a new drive.
Reinstall the operating system
Start your computer by plugging it in. While the computer is running, press the escape key. The BIOS key varies depending on the computer model. The boot menu will now appear. Follow the instructions displayed in the prompt windows. Make a new partition, format it, and install Windows on the new hard drive.
You have two choices here: customize it to your liking or stick with the default settings. After Windows has been installed, you may be prompted to restart your computer. Before it is finished, the computer may restart itself several times. Allow a few hours for the process to finish, depending on your hard drive and operating system.
You’re ready to start using your new drive once the computer has restarted for the final time.
Reinstall your Programs and Files
You can start the process of putting back things you want on your computer now that Windows has been working on a new hard drive. The software recommended for the recovery of files should be used to access your cloud backup or external drive. Just select the files you want to restore and you’re done.
Conclusion
Hopefully, now you have a complete understanding of how to replace a laptop hard drive and reinstall the operating system. So, to complete the task quickly and efficiently, carefully follow the steps we’ve outlined.